TL;DR
Cold storage in the ground is the fifth preservation method alongside canning, fermenting, drying, and freezing, and the only one that runs on zero electricity. Two builds work well in a home garden: a mini root cellar made from an old washing machine drum (about 3 hours to build) and the classic straw-layered earth mound, known in German as an Erdmiete (target inside temperature 2 to 8 degrees Celsius). Root vegetables like carrots, beets, and potatoes keep for months; in one documented example, beets stayed crisp until the end of March and were still edible in mid-April.
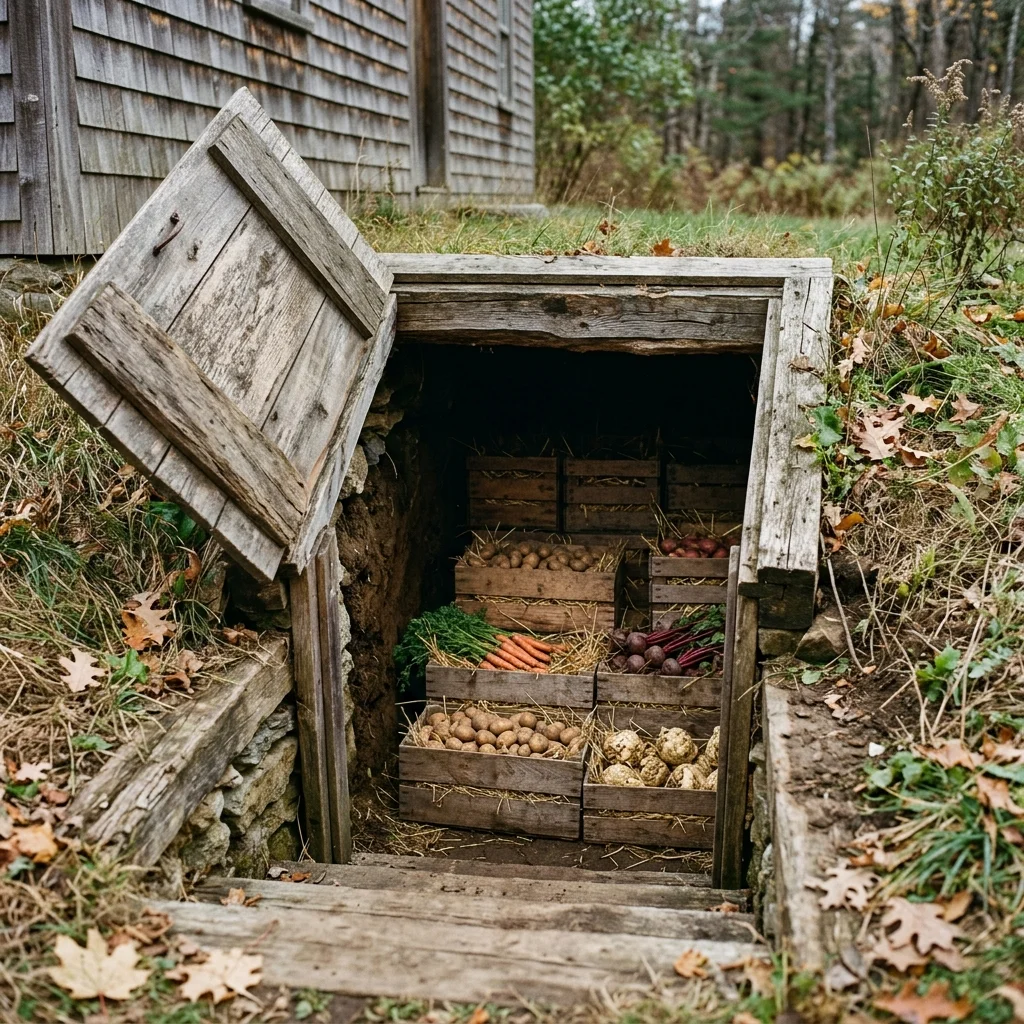
A root cellar costs not a single cent in electricity and still keeps root vegetables fresh for months, the same way generations did it long before refrigerators existed. Cool, dark, and with the right humidity, the ground itself does the job of a fridge.
This article covers two concrete builds for your own garden: the small root cellar made from a discarded washing machine drum for smaller quantities, and the classic straw-layered earth mound for bigger harvests. Plus a materials list, the build time for each, and a table of which vegetables actually suit cold storage and which don't. If you already know the four common preservation methods, canning, fermenting, drying, and freezing, compared in detail in our article on the four preservation methods, here's the fifth one: cold storage with zero energy input.
Cold storage as a fifth preservation method
All four common preservation methods change the food in some way: through heat when canning, through lactic acid when fermenting, through removed water when drying, or through sub-zero cold when freezing. Cold storage in the ground works differently. It doesn't change the vegetable at all. It stays raw, fresh, and ready to cook exactly as it was on harvest day, just kept cooler than your kitchen would manage on its own.
The physics behind it is simple: ground below about a meter deep holds a fairly constant temperature of roughly 7 to 13 degrees Celsius year-round, well below summer air and well above winter frost. A hole in the ground, properly insulated and kept dry, works as a refrigerator with zero electricity and zero running cost.
Two builds compared
Two builds have proven themselves in home gardens, depending on how much you harvest and how much space you have.
| Criterion | Mini root cellar (washing machine drum) | Classic earth mound |
|---|---|---|
| Build time | about 3 hours | half a day to a full day |
| Capacity | a few kilos to one crate, for 1-2 people | several hundred kilos, for a family or winter supply |
| Main materials | old drum, styrofoam/corrugated cardboard, wooden lid | wire mesh, gravel/sand, straw, soil |
| Target temperature | cool and frost-free | 2 to 8 degrees Celsius |
| Effort | low, works even in small gardens | higher, needs more space and excavation |
For a first attempt with minimal effort, the mini root cellar is the way to go. If you plan to store larger quantities every year, the classic earth mound is hard to avoid.
Building the mini root cellar from a washing machine drum
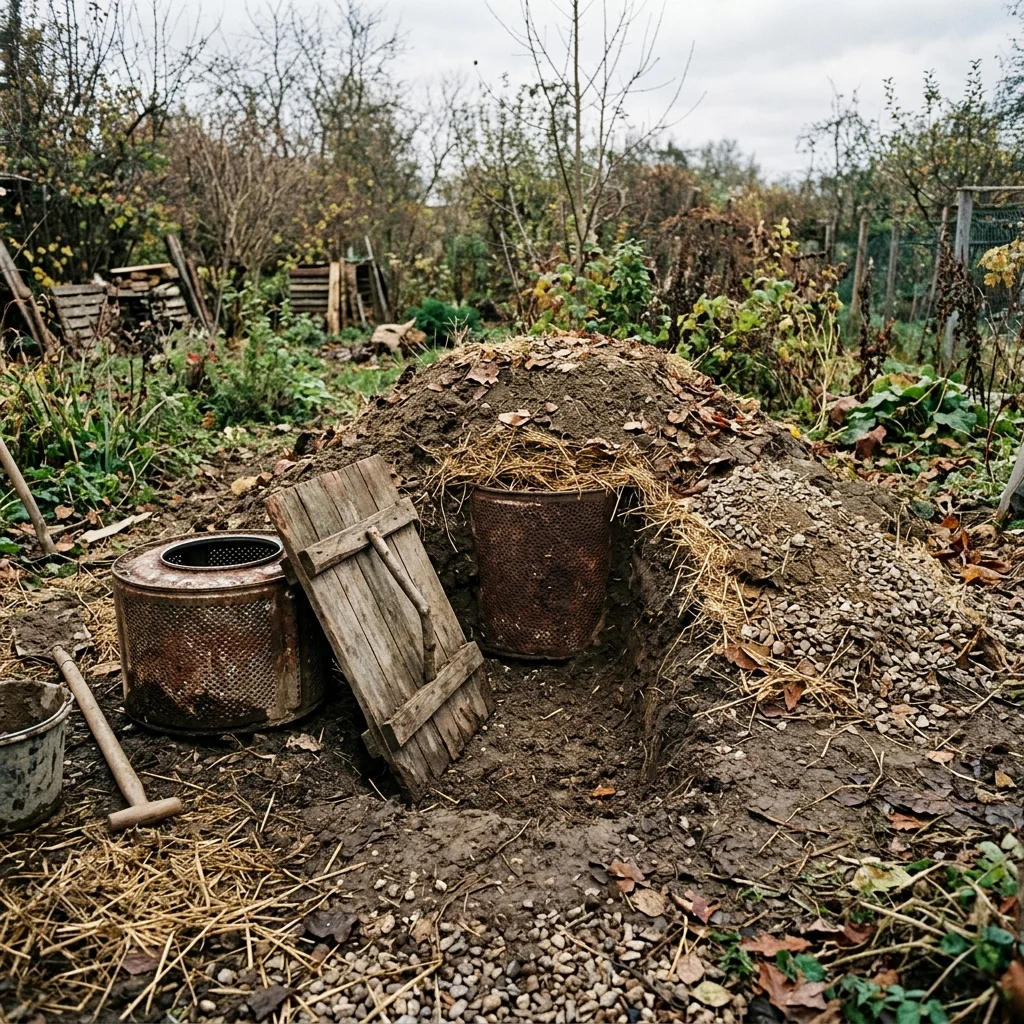
A discarded washing machine drum is already almost shaped for cold storage: round, sturdy, with fine holes that double as ventilation. Built to the instructions from smarticular.net, the whole thing takes about three hours.
Materials: an old washing machine drum (recycling center or secondhand, usually free), a spade, roughly 3 cm of styrofoam or corrugated cardboard for insulation, wooden boards for the lid, screws or nails.
- Dig the hole: about 10 cm deeper than the drum is tall, so it sits flush with the ground.
- Set the drum in: lower it into the hole and level it.
- Insulate the inner walls: with about 3 cm of styrofoam or corrugated cardboard, this keeps frost out and moisture more even.
- Build the wooden lid: 36 x 36 cm on the inside so it fits the opening, 40 x 40 cm on the outside so it rests flush and seals well.
- Close it up: set the lid in place, and optionally cover it with a layer of soil or mulch for extra insulation.
Tip
Pick a drum with the finest holes you can find, or tape mesh over larger openings. That keeps mice out far more reliably than the lid alone.
Building the classic earth mound
Bigger harvests need more than a drum. The classic earth mound is essentially a layered hill of wire mesh, drainage, produce, straw, and soil, built to the layout from hoklartherm.de. Target inside temperature: 2 to 8 degrees Celsius.
- Lay the wire mesh: against rodents, across the bottom and sides of the pit.
- Add drainage: roughly 10 cm of gravel or sand, this keeps water from pooling underneath.
- Layer in the produce: dry, undamaged vegetables placed in the center.
- Press down the straw: 15 to 20 cm of dry straw pressed firmly, this insulates against frost and moisture from above.
- Finish with soil: pull a waterproof layer of soil over the whole mound.
Note
The more frost-sensitive the vegetable, the deeper it should sit in the mound. Potatoes and root vegetables tolerate more cold than, say, cabbage heads, which usually go in the upper layers.
Choosing the right location
The best build doesn't help much in the wrong spot. Three criteria decide whether an earth mound or mini root cellar makes it through winter or turns to mush by spring.
- Semi-shaded: direct summer sun needlessly heats the top layer of soil, a spot in the shade of a building or tree keeps the temperature more stable.
- Well drained: waterlogging is the most common reason stored vegetables rot. A slightly raised, never swampy spot is non-negotiable.
- Close to the house, ideally on the north side: short trips in winter, and the north side gets the least direct sun anyway.
Which vegetables work, and which don't
Not every vegetable benefits from cool, damp darkness. Root and tuber vegetables with a firm skin are practically made for the earth mound, while watery summer vegetables rot there faster than they would in a fridge.
| Vegetable | Suitability | Note |
|---|---|---|
| Potatoes | Suitable | keep dark and frost-free, sprout more slowly there |
| Carrots, parsnips, parsley root | Suitable | keep for months, remove greens before storing |
| Beets, kohlrabi, swede/rutabaga | Suitable | documented: beets stayed crisp until end of March |
| Celeriac, winter radish, leeks | Suitable | trim leaves or tops before storing |
| Cabbage varieties (white, red, savoy) | Suitable | remove outer leaves, store stem-side down |
| Apples | Suitable, but separate | release ethylene, which ages nearby vegetables |
| Onions, garlic | Not suitable | need dry, airy storage rather than damp soil |
| Pumpkin, squash | Not suitable | needs it warmer and drier than the mound provides |
| Tomatoes, cucumbers, peppers | Not suitable | can't tolerate cold, turn mushy or suffer chilling injury |
| Lettuce, fresh herbs | Not suitable | wilt too fast, better used fresh or dried |
Exactly how long each vegetable keeps isn't documented week by week in the available guides, only as a rough number of months. One recorded practical example: beets stayed crisp until the end of March and were still edible in mid-April, concrete evidence of half a year or more of storage when the location and build are right.
Caution
Apples store well in cool conditions too, but never in the same mound as vegetables. As they ripen, apples release ethylene gas, which makes nearby vegetables age and sprout faster. Storing them separately isn't optional.
Limits of this method
Both smarticular.net and hoklartherm.de are practical guide sites with no named author and no scientific citation behind them, no institute or authority stands behind these instructions. For a purely practical topic with no legal or financial stakes, that's acceptable, but it's not an official recommendation. ÖKO-TEST confirms the earth mound as the oldest form of vegetable storage, but doesn't offer a scientific comparison study either.
The stated storage time of several months is based on practical experience, not verified week by week per variety. How long your own vegetables actually keep depends on harvest quality, how that particular winter plays out, and how consistently you pull out damaged or rotting pieces right away. A single rotten piece can spread quickly through the damp environment of a mound.
Extremely hard frost or an unusually mild, wet winter can push the target range of 2 to 8 degrees Celsius above or below where it needs to be. Checking regularly, at least every few weeks, is as much a part of the method as building it in the first place.
Frequently asked questions about root cellars
How long do vegetables keep in an earth mound or mini root cellar?
The available guides don't offer a week-by-week table per vegetable, only a rough figure of several months. One documented practical example: beets stayed crisp until the end of March and were still edible in mid-April. The exact duration varies with the vegetable, harvest quality, and weather.
Can I store fruit and vegetables together in an earth mound?
No. Apples and other fruit release ethylene gas as they ripen, which makes nearby vegetables age and sprout faster. Fruit needs its own, separate mound or cellar.
What does it cost to build a mini root cellar from a washing machine drum?
The drum itself is usually free from a recycling center or secondhand. Insulation material and the wooden lid typically cost only a low double-digit euro amount, and the build takes about three hours.
Does an earth mound work in a mild winter or a small city garden?
The mini root cellar made from a washing machine drum works especially well for small gardens with limited space. An unusually mild, wet winter can push the target range of 2 to 8 degrees Celsius upward; an extra layer of straw or mulch partly compensates for that.
How do I protect the storage from mice and voles?
Fine wire mesh across the bottom and sides of the pit, laid down before the produce goes in, is the main protection in both builds. For the washing machine drum, taping mesh over the holes helps too.
Sources
- smarticular Verlag, "Erdmiete selber bauen: Gemüse und Obst lagern ohne Strom", smarticular.net, accessed 2026-08-19
- Hoklartherm, "Erdmiete selber bauen – Anleitung & Tipps", hoklartherm.de, accessed 2026-08-19
- Sven Heitkamp, "Kein Lagerplatz für Kartoffeln, Rüben & Co.? – So bauen Sie Erdmieten", ÖKO-TEST, Oct 16, 2022, accessed 2026-08-19
This content was created with AI assistance, primarily for research and drafting. Reviewed and approved by our editorial team.